 올인원 COB LED TV
 유연한 LED 디스플레이
 투명 LED 디스플레이
 주도 포스터
 원형 LED 디스플레이
 컬럼 LED 스크린
 창의적이고 맞춤형 LED 디스플레이
Stage LED production guide: from rider to rehearsal
Turn the stage rider into three drawings: the audience-facing elevation, the cabinet and signal map, and the loading plan. A single width and height will not tell the content designer where a side wing starts or tell the crew which cases to open first.
Assign the decisions before load-in
| 대표이사 | 입력 | 승인된 출력 |
|---|---|---|
| Production designer | Stage drawing and sightlines | Active face, wings and trim |
| Video department | Camera feed and playback content | Native canvas and scaling |
| 공급업체 및 운영자 | Cabinet, receiver and processor | Mapped system and restore files |
| 물류 책임자 | Case schedule and venue access | Load order and crew handover |
Mark the programme area and any side screens separately. If the backdrop includes a concave section, give the rental supplier the visible arc, audience side and seam location in addition to the front elevation.
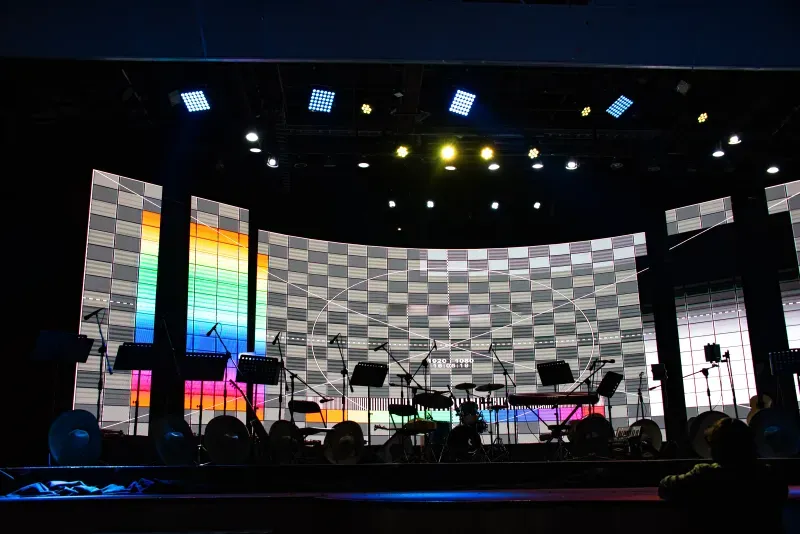
Keep the content map with the elevation
For a curved indoor Flex wing, give playback the unfolded LED surface and the stage designer a plan view. Mark the seam on both. The straight-line width seen by the audience and the surface length available for the artwork are different measurements.

Record the acceptance take
Use the production camera and representative playback content. Record a wide shot, a close angle and a dark transition. Keep the approved settings and the receiving-card configuration with the screen schedule. Tag the cases and spares for the exact configuration that passed the test.
A flat backdrop from rider to rehearsal
For a worked production brief, use a 6 × 3 m Matrix 500 outdoor P3.9 wall and a 16:9 programme feed. The drawing gives twelve columns by six rows. At 128 × 128 pixels per cabinet, playback receives a 1,536 × 768 canvas. Have the designer decide how to use the side space when the full programme is fitted to the wall height; carry the approved framing into rehearsal.
| 이양 | File or record to approve | Person receiving it |
|---|---|---|
| Rider to supplier | Dimensioned elevation, viewing side, pixel pitch, video input and camera brief | Supplier’s project lead |
| Supplier to playback | Native canvas and cabinet grid with a labelled origin and numbered corners | Content designer |
| Playback to LED operator | Numbered test frame, approved show file and a reference still of the intended crop | LED operator |
| Rehearsal to show crew | Camera clip, working brightness, map revision and the location of a restore copy | Show caller and incoming operator |
When a stage wing changes after content sign-off
Mark the change on the elevation first. A narrower active face, a moved side wing and a new content crop are separate decisions. Have the LED operator issue the revised map, then have playback export a matching test frame. Run it through the actual signal path and compare the physical corners with the drawing before releasing revised show media.
- Write the elevation, map and playback file revisions on one handover sheet.
- Mark stage left and audience left explicitly and identify the first physical cabinet.
- Keep one approved camera take and name the person authorised to sign off the revised framing.
- 주제
- event staging LED production guide
- 선택
- Turn the stage rider into three drawings: the audience-facing elevation, the cabinet and signal map, and the loading plan. A single width and height will not tell the content designer where a side wing starts or tell the crew which cases to open first.
- 구성
- Mark the programme area and any side screens separately. If the backdrop includes a concave section, give the rental supplier the visible arc, audience side and seam location in addition to the front elevation.
What must the video supplier receive with the first version of the stage rider?
What file should the content designer make for the 6 × 3 m example?
How do we catch a stage-left versus audience-left mapping mistake?
What changes in the graphics handover for a curved indoor wing?
Who signs off a last-minute change to the active face?
What does the incoming operator need when rehearsal ends?
밝기 요구 사항에 대해 논의하십시오.
화면에 필요한 기능을 알려주세요. 정사각형 구성으로 제안해 드리고, 견적을 위해 밝기 및 전력 소비량 정보를 확인해 드리겠습니다.
기기 견적 요청하기